Thursday, 19 September 2019

A bit more progress......


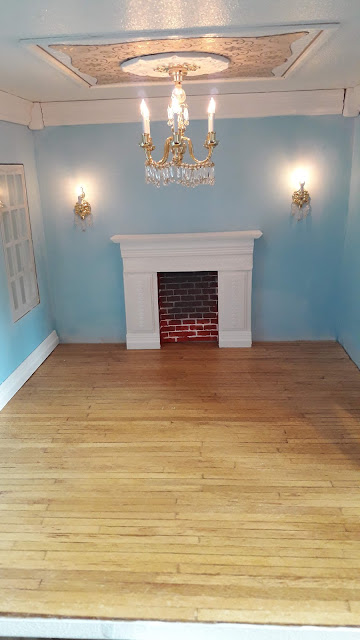
Hello again. I've been busy doing the ground floor and putting in the wall panels, dado rail and skirting, below are a few pics just to update on the present state of the house.
 As you can see all the lights are now in and working, next are the doors for the main house and then I will fit all the skirting, dado rails and wall panels in the rest of the rooms. I still need more fire surrounds too. That should keep me busy next week.


A few close ups

The morning room

Entrance hall and first floor landing

 The Dining room

top bedroom left

Top landing

Top room right, possible music room

Gents bedroom/study

Middle landing chandelier (my favourite)

Internal doors to be painted

That's the update for today more to come when the doors are fitted and then I can start on the outside and roof and the basement, not sure which will come first....it will be fun whatever way I do it and that's what it's all about. A big thank you for your comment too It's lovely to know that you are enjoying the journey. xxx


Thursday, 5 September 2019

Lights at last....and a whole lot more


Its been a while but I finally managed to get the lights working in the house, and what a difference it makes to the overall feel of it. It's starting to come alive now.


I've been making a couple of fire surrounds too one for the blue morning/drawing room and one for the dining room. I made them from Bass wood which is very light and used for model making. After adding a couple of trims I painted them white then added some brick effect to the inside. Still have to get the actual fires but that's further down the line.


I might highlight them with some gold later on I will see how the rest of the decor goes.

*************

Below is the first attempt at panelling for the morning room, it was okay but I really wanted it a bit more refined so I binned that lot and started again


I ended up changing the shade of blue as well this one is a bit lighter and looks a lot better. This time I made the panels on card and used some cutting dies for the top and bottom, I mounted these on to the same card and this will then be stuck to the walls. I spent the whole day yesterday doing all three walls ....I was on a roll so just kept going till it was done. I'm really pleased with them now but have still to attach them to the walls, that's a job for another day.


 below is the cutting die I used


One more update to go

Tiny plates and perfume bottles. The plates were made with pearl card and a 1 inch craft punch I then put on tiny nail decals and painted them with clear varnish. I will make some with Fimo clay later on but I just had this idea and had to try it. Happily it worked well, and was really cheap to make.


The little perfume bottles were made with glass and crystal beads and are 15mm high, the silver plate is made with a craft punch and craft card again. 


Well that's it for this update at last I can see some progress happening and I will be doing the panels in the other rooms soon. I have ordered some doors too as I need them fitted before I can fit the panels......as I found out when I tried to fit them.
Bye for now...


Monday, 5 August 2019

Update on lighting

It's taken a while but I'm finally ready to fit the lights in the main house. Yay !!! A few pics of some of the lights that I have added crystals to. Can't just have plain lights......Georgians loved their bling especially on their lights and furnishings so I'm enjoying adding the crystals, it also saves me a whole lot of cash doing it myself.  To buy a crystal chandelier for a dolls house is around £140 plus...yes I'm not kidding so I have saved myself a small fortune :)


 Three main chandeliers top left morning room, top right main staircase. bottom dinning room.


Dining room in the making


Single candle sconce with added crystals

Double candle sconce with mirror

Single candle sconce with added crystals

small chandelier for bedroom with added crystals

small chandelier for study or library with added crystals

More lights to be added to the top floor as and when they arrive, I will update when they're here.

I'm off now to try and fit them.........more updates when that's done.


Wednesday, 12 June 2019

The Basement and Lighting

Hello again at last I'm back on the build, it's been a really busy month with holidays my Son's wedding and my Granddaughter's Communion, and card orders with absolutely no time to craft at all, so a lot of time to make up.

Today I am building the basement for Dalton Manor it should have been straight forward but because I am adding it to the main house there are a few adjustments to be made and the fact that I am changing the front from a pavement to a garden is going to take a bit of working out too.
 For starters when I build it without the pavement the front drops about 6 inches so I need more stairs to go up to the front door. I have emailed Dolls house direct and ordered more steps so hopefully my plan will work . In the meantime as the house is still upside down I can't fit the basement on yet. When I am finished doing the coving and ceilings I will turn it.


This section goes in front of the basement, this will be the garden at the front of the house and stairs up to the front door

It will be extended at the front (I can use the pieces that were meant for the pavement to extend it) and be grassed. Not sure if it will be a formal 18th century garden or a walled garden but that's further down the road. In the meantime I also have the lighting to start as well.


I now have the transformer and lighting terminals so I can crack on with some of the internal lights but I still need quite a few lights including another 2 or 3 chandeliers , which are not cheap....so I will fit what I have and get the rest later.
 You might notice that they are candle lights, that's because the house being Georgian in the late 1700's they had no electric lights and only used oil and candles. I would like to keep the decor as authentic as possible.

Another update soon when I have the house right side up.


Friday, 26 April 2019

Ceiling panels and mouldings, chimney breasts


 A further update on the ceiling panels that I have been working on. Above is the first floor stair landing with the panel and ceiling mouldings in place. This is the ceiling where the crystal chandelier will hang. No skirting boards fitted yet as I have to be able to get under the floor covering to install the wires for the lighting so the skirting boards will be one of the last things to be fitted in the house.


This is the ground floor entrance way ceiling panel and the mouldings fitted here too.  There is only half a ceiling here as the staircase is open to the first floor. It's quite difficult to get photos of these areas. as the house is still upside down at the moment, so all the photos have been rotated to view them as if the house was right side up, or I could just have stood on my head lol.


Above is the morning room ceiling panel and chimney breast, mouldings will be a little tricky in the rooms with a chimney breast as I have to mitre the corners around them so they will take a bit more time more updates on that next time.


Above is the Dining room ceiling panel and chimney breast, same applies here these two rooms will be done at the same time.


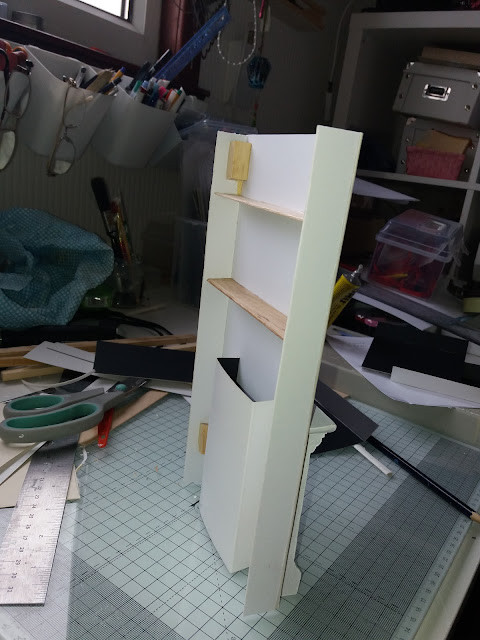
Below photos showing how the chimney breasts were made.


That's it for today,  hopefully I'll get some time to work on it this week. I still haven't made up the basement yet and won't have time now 'till after our holiday and as usual I will post pics when I do it.  Bye for now.